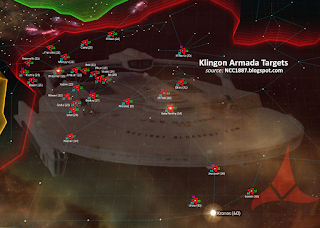
Borg Solo Armadas are now a new mechanic within STFC, in combination with the Command Center. These work similar to the Dominion Solo Armadas (Jem'Hadar Flagship).

NCC1887 Educational Library
An educational archive of tips/tricks for the game Star Trek Fleet Command (STFC).
Information on this site is broken up into sections. Use the Navigation section to find the topic you want.
Popular tips for this month are listed at the bottom of the page.
If this is your first time here, please bookmark the page, and checkout our other sections.
Borg #13 - Borg Solo Armadas
Armada #6 - Getting Started with Armadas
Players will need to be in an alliance that is willing to share with lower level players in order for them to get material to build/upgrade their Armada Control Center (ACC). Typically, the lower level player will bring their biggest ship they have to participate. They don't have to survive the fight, but as long as another member does, loot will be awarded to all participants.
Armada #5 - Target Locations/Maps
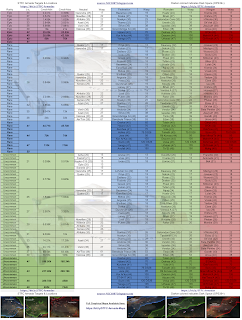
Locating armadas that are appropriately sized can be difficult during an armada hunt event. Here is a chart showing where to find all of the armada targets and approximate rewards. These span Neutral, Faction and Deep Space.
Armada #1 - Main Crews
Officers #7 - Minor Repairs During Battle
Leslie also worked against large armada targets, as long as the damage a player gets is not bigger than what Leslie repairs.
Lesslie is part of the Shakedown Crew, which occasionally shows up in the store. This pack ($20) has good officers to increase the XP gained of ships in battle. These officers are paired well with Pike and a Damage Mitigation Officer (Chen or T'Laan).
Armada #1: Main Crews
Due to their size and power, Armada Targets are not affected by the following research bonuses and abilities:
• Research: Combat - Defensive Tactics
• B’Rel Class - Cloaking System
• Gladius Class - Secret Weapon
• Grace Chen - Energy Absorber
• T’Laan - Objective Defense
• Tal - Resistance
• Mara - Wife of a Dahar
• Qa’ug - Excel under Pressure
• Severus - Spreading Fire
• Yuki Sulu - Disrupting Field
• John Harrison - Sabotage
• Marlena Moreau - No Fear
• Cadet Nyota Uhura - Scan the Enemy
• Vixis - Fake Communiques
• D’joaki - Shatter Defenses
• Chang - Dogs of War
Use the Special Abilities to create conditions against the target that is shared with participants in the Armada (except Morale). This can help add more damage to the target, especially on larger targets.
Armada #4 - Decius vs Khan
Decius: Adds to overall Damage from any weapon when hit
Khan: Adds to Critical Hit Chances when hit
Zhou: Boosts defenses when Morale is active (Uses Defense Points)
Armada #3 - Ship Selection
Players should not be doing Rapid Fire on Armada Targets unless they are hosting Armadas. Share the rewards/fun.
Larger targets, Armada Leader should call “Circle” after starting, to indicate that the biggest ships participate using the circle to decide.
Armada #2: Specialty Crews
*Note: No 2nd Klingon officer against Federation yet, so Merik is still used for the Burning chance.
Popular Tips
-
Locating armadas that are appropriately sized can be difficult during an armada hunt event. Here is a chart showing where to find all of the...
-
This is a map to help with planning of takeovers in Origin Space. ***Updated Oct 2023*** ***These Maps/Schedules do not account for the su...
-
Now that we are collecting materials from the Cardasian Armadas, the alliance can build its own Starbase. This unlocks research for allianc...
-
Officer abilities have been expanded to include "Traits" that are used to enhance the Critical Chance of reward on Away Team Missi...
-
Finding an Assimilated Ferengi Trade ship in Borg space will yield Latinum Antiques that are refined to Tokens: Ship XP (*Prime Borg Rewards...


